Map a Small Plot That Flows
When planning an outdoor space between 12 and 45 square meters, the first temptation is to sketch where the flowers and furniture will go. Yet experienced small-plot designers start with the empty spaces: the threshold landing outside the back door, the primary walking spine, and the knee-and-chair clearance zones. Once movement feels natural and unobstructed, the remaining pockets automatically reveal the strongest places for deep planting beds and built-in seating.
MAP MY SMALL SPACE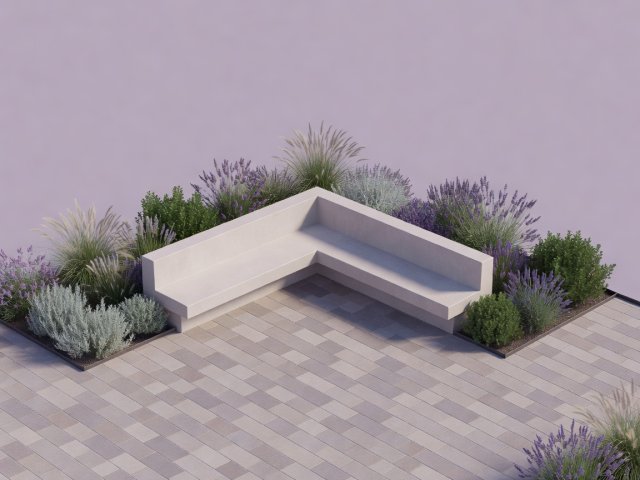
1. Establish Circulation Clearances First
Every small garden has a desire line—the path your feet take from the kitchen door to the sunny seating corner, the bicycle shed, or the rear gate. If that path requires weaving around three separate pots and a protruding barbecue hood, the garden will feel stressful even when empty.
-
900mm Primary Spine: Reserve a straight or gently curved 900mm corridor free of overhanging thorny stems or low furniture corners.
-
750mm Chair Pull-Back Allowance: A standard outdoor dining chair needs 500mm while occupied and 750mm to slide back so a guest can stand up without stepping into a soil border.
-
1200mm Door Swing Landing: Keep the arc of outward-opening French or bi-fold doors completely flush; start raised planters at least 300mm beyond the open door leaf.
2. Three Proven Small-Yard Archetypes
Depending on whether your plot is a square box, a long narrow "bowling alley" terrace, or a shallow wide courtyard, one of three geometric structures will unlock the footprint:
-
The 45-Degree Diagonal Grid (Best for Square Plots): In a 4m × 4m square yard, your eye immediately reads the parallel back fence. Turning porcelain pavers and a timber boardwalk to a 45-degree angle draws sightlines to the opposing corners, stretching perceived length by 1.41× (the hypotenuse ratio).
-
Offset Staggered Zones (Best for Long Narrow Plots): In a 3m × 9m corridor garden, running a straight path down one wall accelerates the eye to the back fence. Instead, alternate left-to-right planting peninsulas (each extending 1.1m inward) so the path steps gently around foliage screens.
-
The L-Bench Perimeter Wrap (Best for Micro-Yards under 18m²): Eliminate free-standing chairs entirely on two sides by building a cantilevered 450mm-high cedar bench directly into raised rendered block planters.
Comparing Layout Footprints & Usable Ratios
To prevent hardscaping from turning a small yard into a sterile parking bay—or over-planting from leaving nowhere dry to sit after rain—aim for a balanced ratio of hard floor, integrated seating, and permeable planting area.
| Plot Shape & Size | Recommended Hard Paving % | Permeable Planting & Trough % | Optimal Seating Configuration | Drainage & Level Strategy |
|---|---|---|---|---|
| Micro Courtyard (3.0m × 3.5m) | 60% (6.3 m²) | 40% (4.2 m² + walls) | Built-in corner L-bench + 2 folding stools | Single-fall 1:60 slope into a 100mm gravel perimeter French drain |
| Townhouse Corridor (3.5m × 8.0m) | 55% (15.4 m²) | 45% (12.6 m²) | Mid-garden dining deck; rear single reading chair | Permeable clay pavers laid on 50mm angular grit sub-base (SuDS compliant) |
| Wide Shallow Patio (6.0m × 3.0m) | 50% (9.0 m²) | 50% (9.0 m²) | Side-tucked bench looking across length of plot | Slot channel drain along house threshold below damp-proof course (150mm min) |
Optical Depth: Borrowing Scale Through Materiality
Architects working on pocket parks—such as New York's Paley Park or compact Japanese tsubo-niwa courtyard gardens—rely on three material principles to expand perceived space:
Limit Hard Materials to Two Tones: Combining red brick, grey slate, yellow gravel, and dark stained decking chops a small floor into competing fragments. Choose one calm base paver (such as pale buff sandstone or brushed basalt) and one warm timber accent repeated on both the bench slats and vertical wall battens.
Flush Threshold Transitions: Laying outdoor porcelain or timber decking in the same orientation as your indoor floorboards—separated by a slim slot drain—tricks the brain into reading the courtyard as an extra room of the house.
Step-by-Step Base Mapping Checklist
-
Measure boundary lengths and check whether corners are true 90-degree angles using the 3-4-5 triangle tape method.
-
Mark the damp-proof course (DPC) on house walls; finished paving must stay at least 150mm below the DPC unless an engineered channel drain is installed.
-
Chalk out your proposed table and bench footprint directly on the ground with builder's line or cardboard sheets, then walk through with a tray to test real clearance.